
")
12.1. Remote Control with DMX
12.1. Remote Control with DMX
According to the settings at Options -> DMX -> incoming DMX the incoming DMX signals are processed through the DMX Input Mapping. These signals then control the specified window. Mouse and Keyboard control remains active as well.
12.1.1. Timeline Window DMX Control
To use DMX remote control for Laserworld Showeditor it is necessary to configure the settings in Options -> MIDI-DMX first. DMX input signal handling can negatively impact on the computer’s performance if running together with complex ILDA output, so the settings for the DMX request value should not be set faster as needed.
To control the timeline over DMX the laser output must be switched on in the software and a folder containing the figures must be loaded properly (Figure Table). To call figures over DMX, these have to be assigned to a key and to a DMX value (See “Live Window”, chapter “DMX assignment” in Chapter 13.1.6).
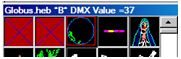
If DMX values have been properly assigned to a figure, the DMX value of the active figure is shown in the header of the Figure Table (See Fig.134). DMX value “0” means black-out, no figure output.
It is possible to use the function keys F0 to F12 for DMX figure control as well. They are accessible through DMX channel 19.
The routing of DMX-IN signals to the control channels can be specified in Options -> DMX -> DMX Input Routing (See Fig.136).
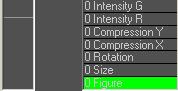
This configuration dialog allows for very specific assignment of DMX channels. The channel assignment corresponds with the order of the tracks and subtracks in the Timeline, starting from the lowest track.
Thus the first channel (depending on the DMX-input offset) is the sub-track “0 Figure” (Fig.135), the second channel is the sub-track “0 size” and so on.
There are 19 channels in total per track (DMX-out is not supported in this case).
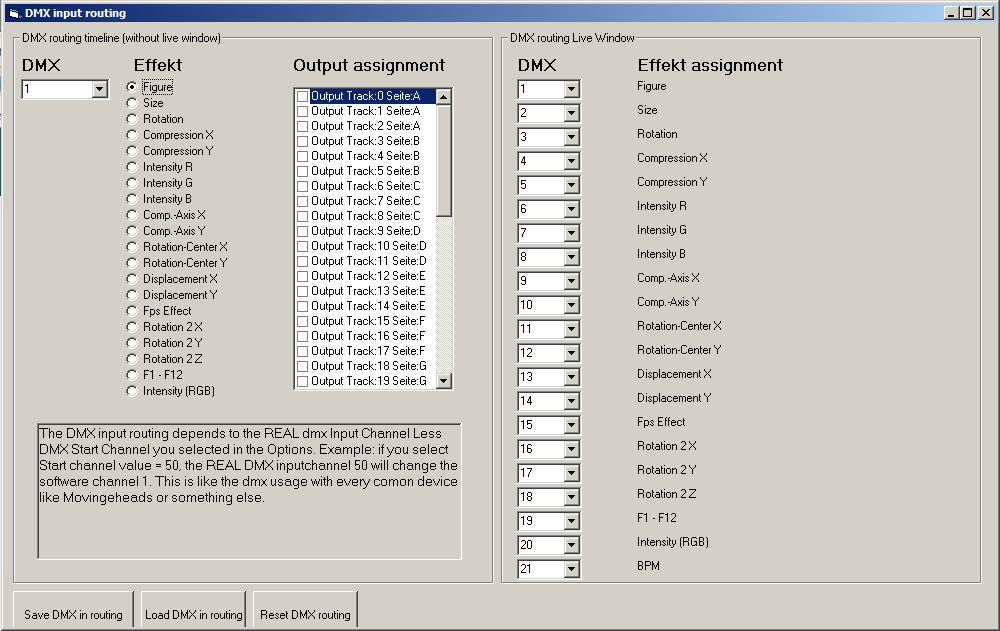
Fig.136: DMX assignments (Options, Midi-DMX, DMX Input Routing)
12.1.2. Live Window DMX Control
The remote control of the Live Window over DMX is very easy. Like described in the previous chapter for the Timeline control, it is possible to call the figures over DMX if a DMX value has been properly assigned. It is also possible to change the effect settings of the active figure trough DMX.
The Live Window requires 20 DMX channels in total.
The standard assignments can be specified in Options -> DMX -> DMX Input Routing (See Fig.136).