
")
3.7. Make a Live Laser Show
3.7. Make a Live Laser Show
Laserworld Showeditor has an implemented Live Laser Show window. When doing a live laser show, the figures assigned to keys can be triggered by pressing the respective key on the keyboard, DMX-controller or MIDI controller (depending on the setup). The use of a touch screen monitor is also possible.
3.7.1. Load figure set
Before a live laser show can be run, either an existing show must be loaded to the Figure Editor already, or an existing Live Show must be loaded. As standard Laserworld Showeditor comes with a basic set of live show patterns, however own pattern sets can be created.
A Live Show basically consists of a set of figures which are assigned to certain keys.
Like with Timeline shows, all contents of a live show need to be stored in one folder (figure files, key set, etc.). Live shows have the file extension *.live.
When a live show was successfully loaded, the live window looks similar to this – showing previews of the very figures at their respective position on the keyboard (Fig. 22).
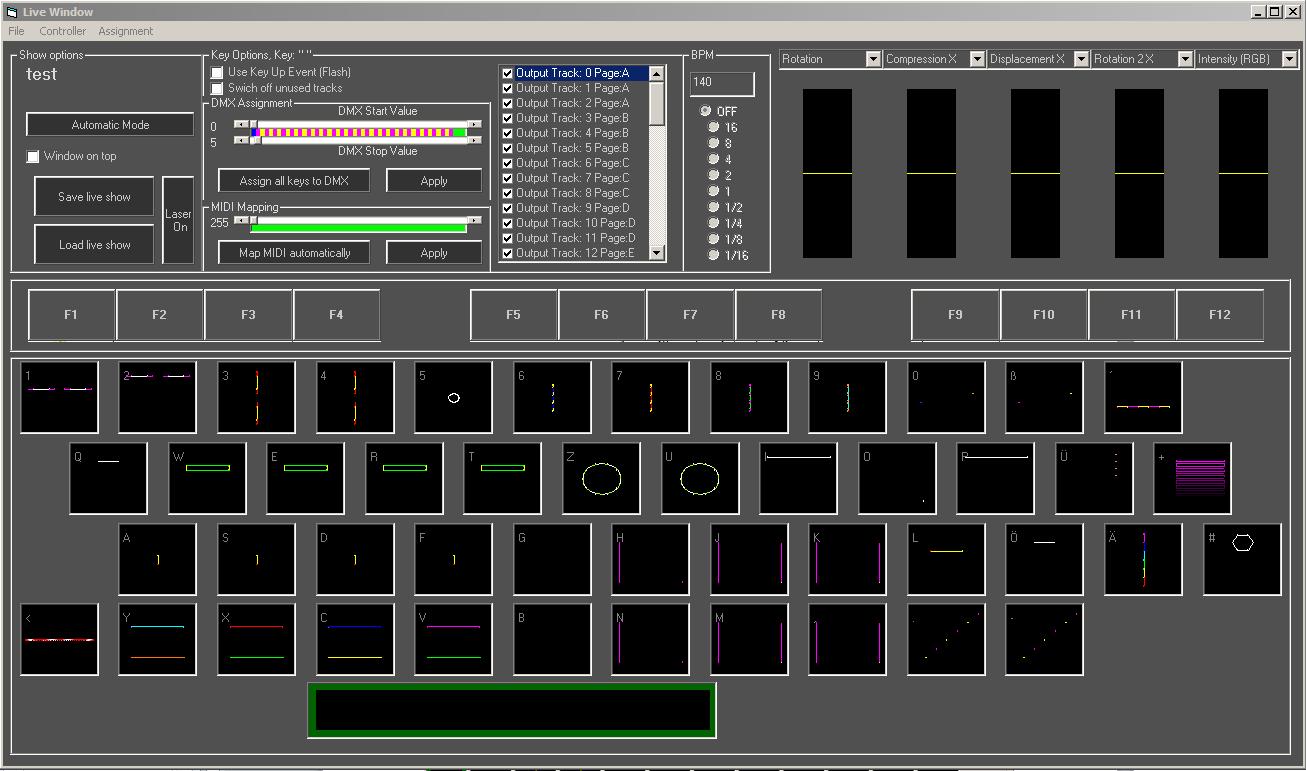
Fig.22: Live Window after loading a live show
3.7.2. Faders/Sliders:
In the upper right corner of the Live Window, several faders are available. These faders can be assigned to different effects.
They can either be dragged with the mouse or assigned to a DMX controller or MIDI controller.
For easy show operation it is recommended to use a DMX or MIDI controller for the fader control, as it allows for quicker reaction and smoother operation as with the normal mouse.
3.7.3. Starting the live show:
The live show starts with a click on “Laser ON”. As soon as the laser output is activated this way, the show can be played. The individual figures can be selected by:
- Mouse click (left button)
- Pushing the respective key on the keyboard
- Touchscreen
- DMX
- MIDI
The active selected figure can be identified by its green frame (see Fig.23, key “Spacebar”). The “Space” key switches off any output.
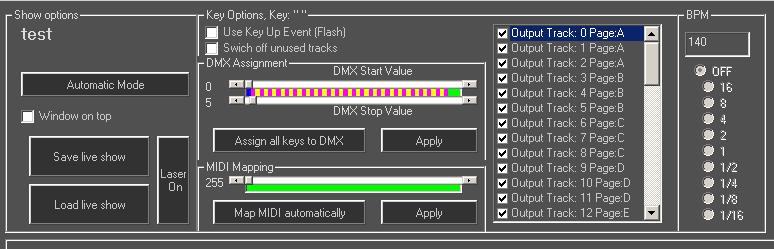
Fig.23: Detail view of the Live Window after having loaded a live show
3.7.4. Setup options per key
Individual settings can be assigned per key. This are some examples:
“Use Key Up Event (Flash)”: Only plays the figure as long as the corresponding key is pressed. Output stops, as soon as the key is released, when this option is active.
“Switch off unused tracks”: Switches off all other figures that output on other channels, if they are different from the figure selected.
Output Track 0 to 47: Specifies which output channel the very figure shall be routed to.
Selection of effects 0 to 5 (sliders): The effects that should be predefined per slider can be assigned per key, so the layout of the sliders can change depending on the active key.
DMX assignment: Each key can be assigned to a specific DMX value. Consider the DMX input mapping for doing this. The first DMX channel is set for selecting the figures per default. DMX control requires prior DMX assignment, otherwise it will not work.
MIDI assignment: The figures and faders can also be triggered by MIDI. Laserworld Showeditor already comes with some standard MIDI setups for common controllers. Of course, custom MIDI settings can be created as well.
3.7.5. Summary of “routings”, “mappings” and “assignments”:
Assignment of keys:
Figures are assigned to keys. Pushing the assigned key calls the figure for output.
MIDI or DMX assignment:
This assignment determines which MIDI controller value or DMX channel calls which figure.
Routing (Output routing):
This assignment determines which track pages A-P (each with three output tracks) is routed to which hardware interface (DAC).
All changes have to be saved! If you want to use your settings (new show) again, then click now on “Save Live Show”.
All features (especially MIDI) will be explained in detail in the Main Manual.
3.7.6. Live Show - Get started quickly
The creation of a live show is similar to the creation of a “normal” laser show. These are the main steps to follow:
- Make a new show folder on your hard disk
- Create figures with the Figure Editor and save them to this folder
- Assign figures to keys (best is to do it by Drag and Drop into the Live Window)
- Verify the settings for EACH key and eventually correct them
- Save the new live show by a click on “Save Live Show”.