11.5. Additional Elements (Output, Master, Mapper etc.)
11.5. Additional Elements (Output, Master, Mapper etc.)

11.5.1. DMX Interface
The DMX interface(s) are configured in the Figure Editor Options -> DMX. Please see Chapter 8.5 and following.
11.5.2. Scrollbar DMX Master
The master scrollbar applies to all DMX channels. It is comparable to the master-volume of an audio-mixer.
If the “Master Sensitivity” has been set to “false”, the DMX master fader has no influence on “Intelligent” DMX-devices. See the chapter 11.6 about “Intelligent DMX” for further details.
11.5.3. Button: Start DMX Output
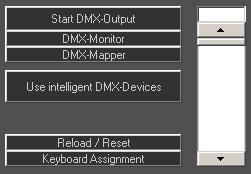
A click on the button “Start DMX Output” enables the DMX output on the hardware device (switches off black-out mode).
On starting the DMX-Output the step timers are activated. The start/stop of the DMX-Output happens automatically on the start/stop of a laser show.
In case there is no DMX-Output, the macro “Note Off Figur ***Aus***” becomes activated automatically.
11.5.4. Button: DMX Monitor
The DMX Monitor opens up in a little window displaying the active values of the 512 output channels. The values automatically update if the DMX output is switched on.
11.5.5. Link DMX Macros to Laser Figures
DMX macros can be linked to laser figures. The linking is done in the Figure Table of the Figure Editor (right click on the laser figure). If the link has been established, a call of the laser figure calls the DMX macro as well. The link refers to the assigned key, so the laser figure and the macro must be assigned to the same key.
11.5.6. Button: DMX Mapper

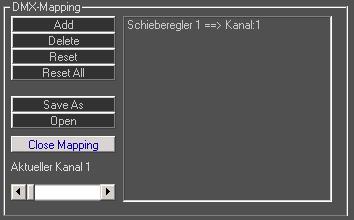
The DMX macros change the values of the scrollbars. These scrollbars are assigned to DMX output channels – and these channels can be assigned individually. Thus it is possible to e.g. use scrollbar 1 to change DMX Channel 24 etc.. It is possible to assign multiple channels.
A click on the DMX Mapper button opens the dialog area shown in Fig.127.
The settings are saved to the program folder on leaving the dialog via “Close Mapping”. Several “mappings” can be used to control the DMX devices by “Save As” and “Open”. The scrollbar that should be edited can be selected with the slider “Active Channel” or with a double click on the name of the scrollbar in the list.
This feature helps in making the adaption of DMX macros to different hardware combinations in different venues and with different users possible.
11.5.7. Macro Area

The Macro Area holds all created Macros, similar to the Figure Table in the Figure Editor. All Macros that are present in the active show folder are displayed there. They can be selected with the mouse either for editing or output.
Key Assignments are not done here, but with using the button “Keyboard Assignment”
11.5.8. DMX Macro “Note off Figur***Aus***”
Note off is equivalent to “Release Key”. On DMX-recordings the NOTE OFF function works, too. Thus a macro can be stopped by releasing the respective key (e.g. lamp on/off), but then the NOTE OFF macro is called, which sets all DMX-channels to 0. This may be an unwanted effect if intelligent lighting is used.
To only set one Channel to 0, e.g. the channel for brightness, it is necessary to write a special macro doing exactly that.


