13.2. Options per Key
13.2. Options per Key
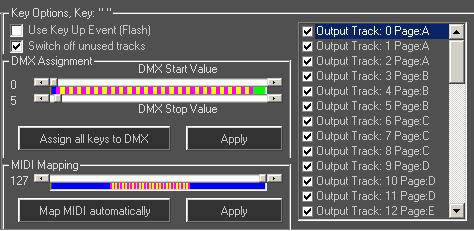
The next part of the Live Window shows the options that can be specified per key (Fig.141). The label of the frame displays the key the options are applied to (Key options, Key: “Key name”)

Fig.141: Key options
13.2.1. Use Key Up Event (Flash)
If this option is checked, the selected figure is only displayed as long as the respective key is pressed. On releasing the key, the figure output switches off. This usually only works on keyboard control. It does not work on DMX or touchscreen control.
13.2.2. Switch off unused tracks
If this option is checked, all figures on other tracks than the active are switched off.
13.2.3. Output Tracks 0 - 47
By checking the output track, the very figure is routed there. (see Figure Editor settings)
Attention! If Showparts are used, the respective main track must be specified. The configuration of the Showpart handles the rest of the show distribution.
13.2.4. Scrollbars DMX Start / Stop Value(s)
With these two scrollbars the DMX value range for DMX control is set. After having set the value range, the button “Apply” must be clicked for applying the settings.
13.2.5. Scrollbars MIDI Start / Stop Value(s)
With this scrollbar the MIDI value range for MIDI control is set. After having set the value range, the button “Apply” must be clicked for applying the settings.
13.2.6. Buttons “Assign all Keys to DMX” and “Map MIDI automatically”
An automated key assignment for DMX / MIDI can be made with a click on the respective button. This makes sense if many figures are used or just for convenience.
13.2.7. Selection of Effects and intensity

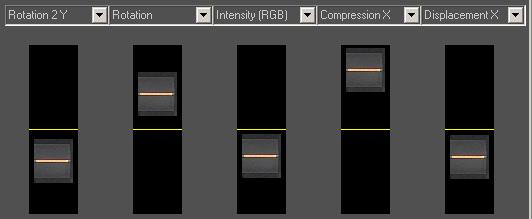
The Showeditor Live Window supports many effects that can be controlled over scrollbars/faders. There are five faders available and each one can be assigned effects to, which is done with selecting the respective effects feature from the dropdown list above the fader.
The control of the faders can be done by mouse click, over touchscreen or through DMX or MIDI remote control. MIDI or DMX offer the most versatile use of the effects and faders here, as they allow for additional combinations.
13.2.8. Settings per key, right click menu
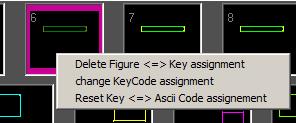
A small menu opens on a right click on a key, shown in Fig.143:
“Delete Figure < = > Key Assignment”. Width clicking on this menu item, the respective figure is unassigned from the very key and thus removed from the Live Window (but of course the figure itself is not deleted)

Change KeyCode Assignment is an important feature for all countries with different keyboard layout. In Germany there is a “QWERTZ” keyboard, in other countries the “QWERTY” keyboard is used. “Z” and the “Y” keys are swopped in both types, nevertheless they have the same ASCII-code.
Thus users of the “QWERTY” keyboard layout should reassign the KeyCodes. To do so, select this menu item and then push every key of the keyboard. The new KeyCode Assignment is saved within the INI file.
It is strongly recommended to do this before creating or loading a Live Show!
Reset Key < = > Ascii Code Assignment allows for reassigning a single key to a new Ascii code, so it is not necessary to reassign the whole keyboard, like explained above, but only to reset the keys that are not assigned correctly.


